A 3D Printed Shell
With 3D printers getting a lot of attention with the COVID-19 pandemic, I thought I’d share a post about an interesting handful of bugs I discovered last year. The bugs were found in a piece of software that is used for remotely managing 3D printers. Chaining these vulnerabilities together enabled me to remotely exploit the Windows server hosting the software with SYSTEM level privileges. Let me introduce “Repetier-Server”, the remote 3D printer management software.
Exploration
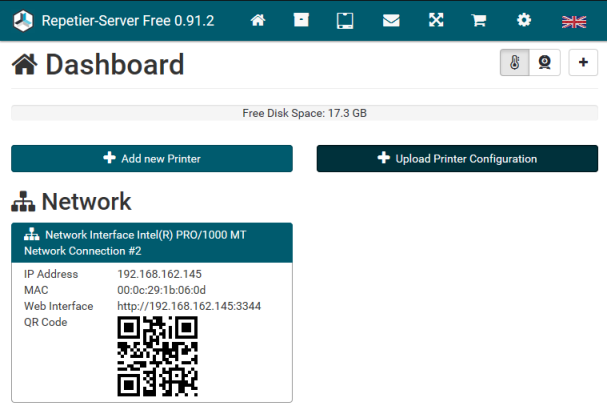
Like many of my past targets, I came across this software while performing a network penetration test for a customer. I came across the page above while reviewing screenshots of all of the web servers in scope of the assessment. Having never encountered this software before, I loaded it up in my browser and started checking it out. After exploring some of the application’s features, I googled the application to see if I could find some documentation, or better, download a copy of the software to install. I was happy to find that not only could I download a free version of the software, but they also provided a nice user manual that detailed all of the features.
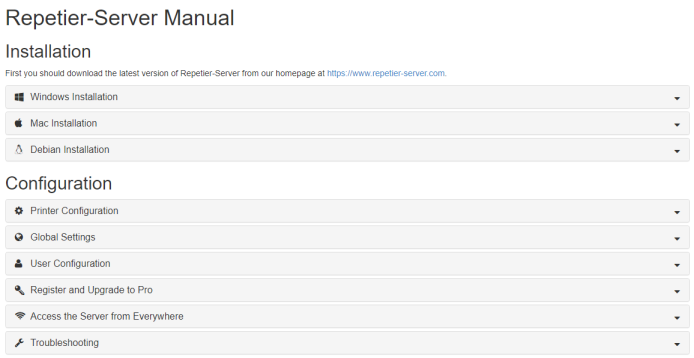
In scenarios where I can obtain the software, my approach to vulnerability discovery is slightly different than the typical black-box web application. Since I had access to the code, I had the ability to disassemble/decompile the software and directly search for vulnerabilities. With time constraints being a concern, I started with the low hanging fruit and worked towards the more complex vulnerabilities. I reviewed the documentation looking for mechanisms where the software might execute commands against the operating system. Often times, simple web applications are nothing more than a web-based wrapper around a set of shell commands.
I discovered the following blurb in the “Advanced Setup” section of the documentation that describes how a user can define “external” commands that can be executed by the web application.
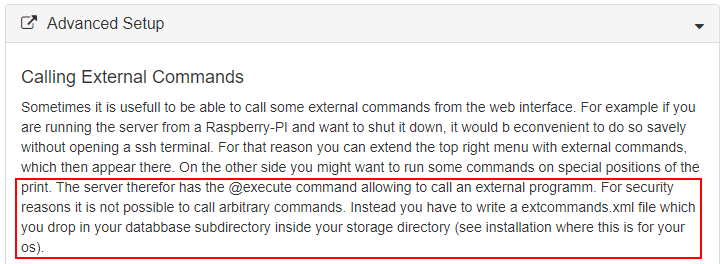
As I had hoped, the application already had the ability to execute system commands, I just had to find a way to abuse it. The documentation provided the syntax and XML structure for the external command config file.
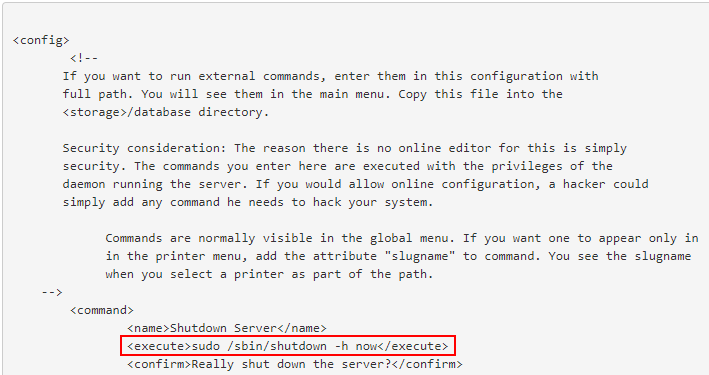
The video below demonstrates the steps necessary to define an external command, load it into the application, and execute it. These steps would become requirements for the exploit primitives I needed to discover in order to achieve remote code execution.
Discovery
Now that I had a feature to target, external commands, I needed to identify what the technical requirements were to reach that function. The first and primary goal was to find a way to write a file to disk from the web application. The second goal was ensuring I had sufficient control over the content of the file to pass any XML parsing checks. The remaining goals were nice to haves: a way to trigger a reboot/service restart, ability to read external command output, and file system navigation for debugging.
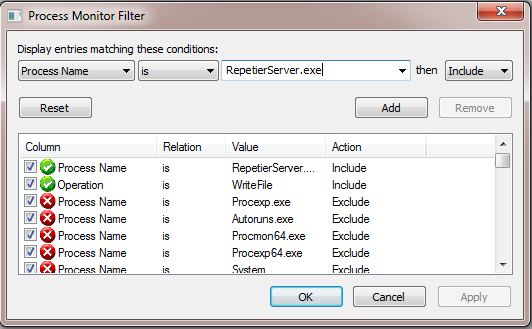
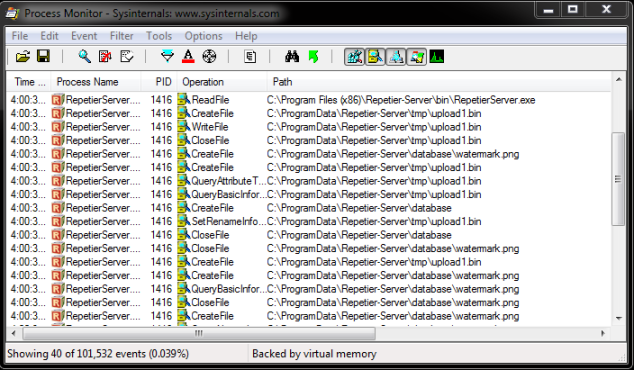
I started up Sysinternals Process Monitor to help me identify the different ways I could induce a file write from the web application. I then added a filter to only display file write operations by the RepetierServer.exe process.
Bug: 1 – File Upload & Download – Arbitrary Content – Constant PATH
The first file write opportunity I found was in the custom watermark upload feature in the “Global Settings – > Timelapse” menu. Process Monitor shows the RepetierServer process writes the file to “C:\ProgramData\Repetier-Server\database\watermark.png”. I had to tweak my process monitor filters because the file first gets written to a temp file called upload1.bin and then renamed to watermark.png.
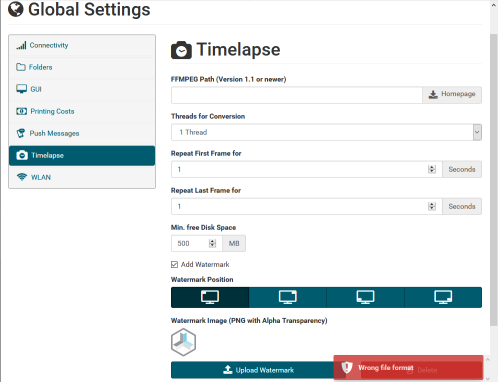
If you attempt to upload a file with an extension other than “.png” you will get a “Wrong file format” error. I opened up Burp to take a look at the HTTP request and see if modifying it in transit allowed us to bypass this check. Often times developers make the mistake of only performing client side security checks in Javascript, which can be easily bypassed by sending the request directly.
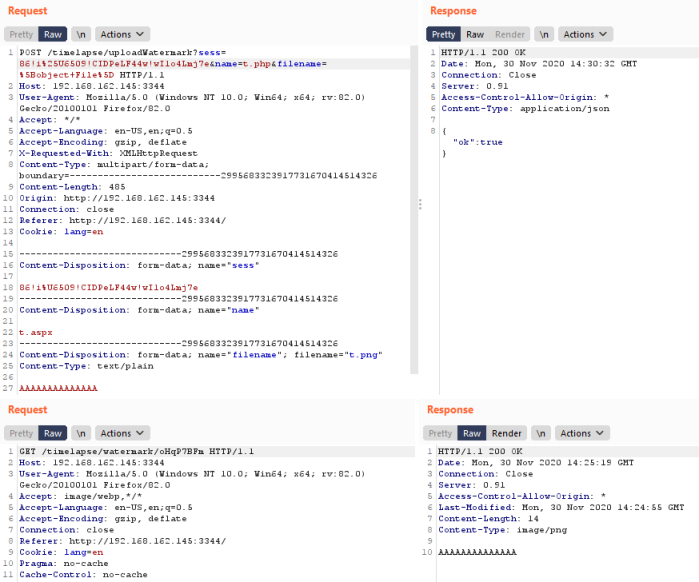
Manually manipulating each of the fields, I found a couple interesting results. It appears the only security check being performed server-side is a file extension check on the filename field in the request form. This check isn’t really necessary since the destination file on disk is constant. However, I did find that the file content can be whatever I want. The web application also provided another endpoint that allows for the retrieval of the watermark file. While this isn’t immediately useful, it means if I can write arbitrary data to the watermark file location, I can read it back remotely. I’ll save this away for later in case we need it.
Bug: 2 – File Upload – Uncontrolled Content – Partially Controlled PATH (Directory Traversal), Controlled File Name, Uncontrolled Extension
Continuing with my mission of identifying file upload possibilities, I started to investigate the flow for adding a new printer to be managed by the web application. The printer creation wizard is pretty straightforward. The following video demonstrates how to create a fake printer on a Windows host running in VMware Workstation.
Based on the process monitor output, it appears that when a new printer is created, an XML file named after the printer is created in the “C:\ProgramData\Repetier-Server\configs” directory, as well as a matching directory in the “C:\ProgramData\Repetier-Server\printer” with additional subdirectories and files.

Attempting to identify the request responsible for creating the new printer in Burp proved elusive at first until I figured out that the web application utilizes websockets for much of the communication to the server. After some trial and error I identified the websocket request that creates the printer configuration file on disk.
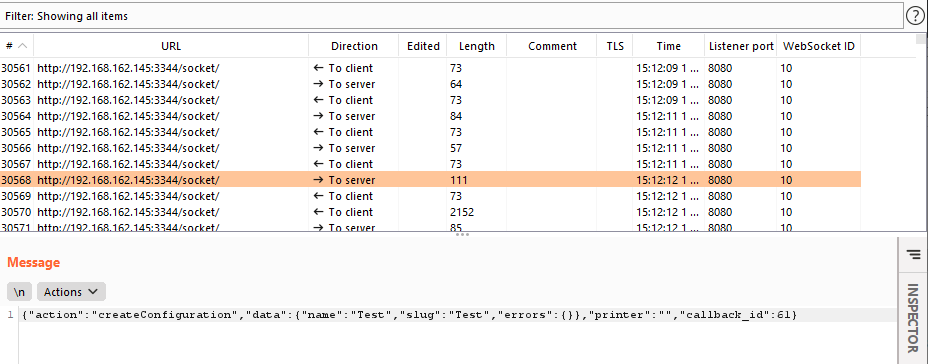
From here I began modifying the different fields of the request to see what interesting effects might happen. Since the configuration file name mirrored the printer name, the first thing I tried was prepending a directory traversal string to the printer name in the websocket request to see if I could alter the path. Given my goal of creating an external command configuration file, I named my printer “..\\database\\extcommands”. To my surprise, it worked!!
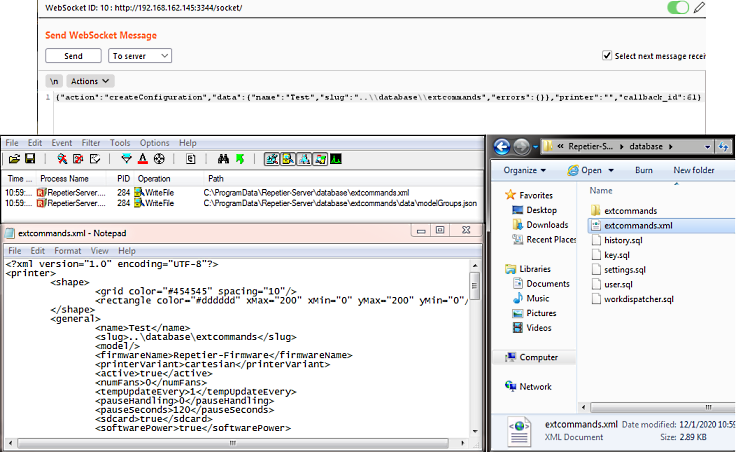
At this point I could write to the file location necessary to load a external command, getting me substantially closer to full remote code execution. However, I still could not control the file contents. I decided to go ahead and script up a quick POC to reliably exploit the vulnerability and move on.
Bug: 3 – File Upload & Download – Partially Controlled Content – Uncontrolled PATH – Insufficient Validation
Starting from where I left off with the directory traversal bug, I began investigating ways I could try and modify the printer configuration file that I had written as the external configuration file. Luckily for me, the web application provided a feature for downloading the current configuration file or replacing it with a new one.
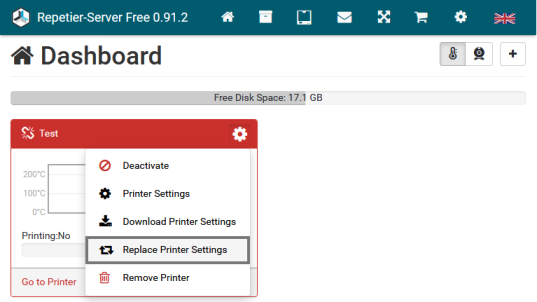
Coming off the high from my last bug I figured why not just try and use this feature to upload the external command configuration file for the win. Nope… Still more work to do.
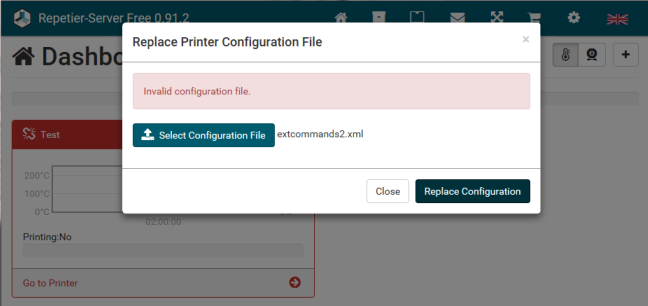
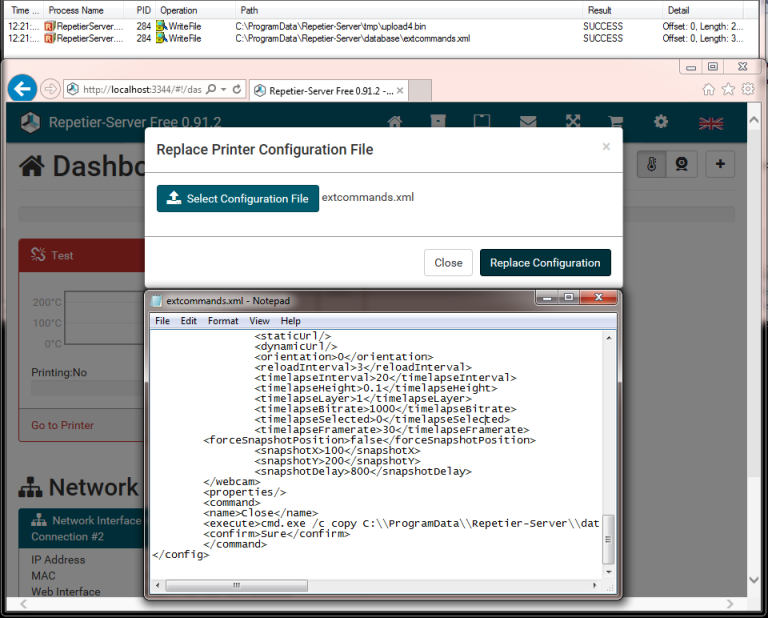
Since both files were XML, I began trying different combinations of elements from each configuration file to try and satisfy whatever validation checks were happening. After spending a fair amount of time on this I just decided to open the binary up in IDA Pro and look for myself. Rather than bore you with disassembly and the tedium that followed, I’ll skip right to the end. Given a lack of full validation being performed on each element of the printer configuration file and the external command configuration file, a single XML file could be constructed that passed validation for both by including the necessary elements that were being checked when each file was parsed. This means I was able to use the “Replace Printer Configuration” feature to add an external command to our extcommands.xml file.
Bug: 4 (BONUS) – Remote File System Enumeration
Digging further into the web application, I also discovered an interesting “feature” located in the “Global Settings – > Folders” menu. The web application allows a user to add a registered folder to import files for 3D printing. The first thing I noticed about this feature is that it is not constrained to a particular folder and can be used to navigate the folder structure of the entire target file system. This can be achieved by simply clicking the “Browse” button.
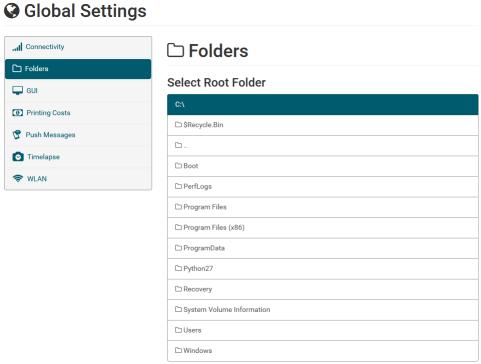
Since this feature references the ability to print from locations on disk, I decided to investigate further by creating a Folder at C:\ and seeing if I could find where the Folder is referenced. After creating a printer and selecting it from the main page, a menu can be selected that looks like a triangle in the top right of the page.
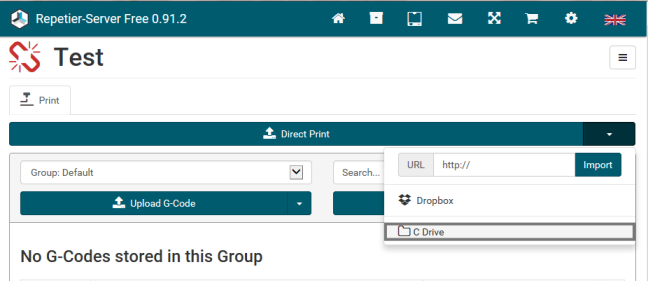
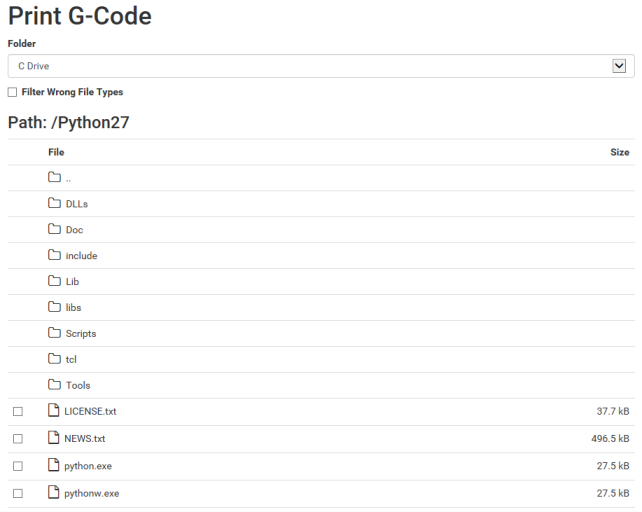
When I select the Folder the following window is displayed. If I deselect the “Filter Wrong File Types” checkbox, the dialog basically becomes a remote file browser for the system. The great thing about this feature from an attacker’s perspective is it gives me the ability to confirm exploitation of the directory traversal file upload vulnerability identified earlier.
Exploitation
Using the vulnerabilities discovered above, I mapped out the different stages of the exploit chain that needed to be implemented. The only piece that I lacked for the exploit chain was the ability to remotely restart the ReptierServer service or the system. Since the target system was a user’s workstation, I would just have to hope that they would reboot the system at some point in the near future. This also meant that replacing the external command would be impractical since it required a service restart each time. I would need to ensure that whatever external command I created was reliable and flexible enough to support the execution of subsequent system commands. Fortunately for me, I had just the bug for this. I could use the watermark file upload & download vulnerability as a medium for storing the commands I wanted to execute, and the resulting output. The following external command achieves this goal by reading from the watermark file, executing its contents, and then piping the output to the watermark file.
Copy to Clipboard
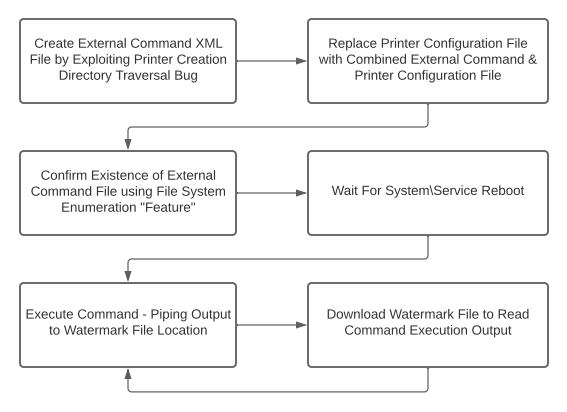
Putting this all together, I came up with the following exploit flow that needed to be implemented.
