From POC to RCE with reverge
Last month, Securifera publicly launched our attack surface management tool, reverge, on the AWS Marketplace. While we’re still planning to publish blog posts and videos to guide users through setup and usage, we wanted to give an example of what reverge can do by demonstrating how it can quickly close the gap between the disclosure of a critical vulnerability and the identification of exploitable instances of that vulnerability on the internet. If you participate in bug bounties, this helps you quickly spot real-world targets and be first to report. For security teams, it makes it easier to see if your systems are affected so you can fix things faster.
We’ll use the recent Ivanti Endpoint Manager Mobile (EPMM) vulnerability as an example, since there’s already a Nuclei template available to confirm whether it’s exploitable. Before jumping into reverge, we like to do some quick research on the vulnerability and the affected product to get a better sense of the situation. In this case, WatchTowr and Wiz both published excellent articles that provide all the background we need.
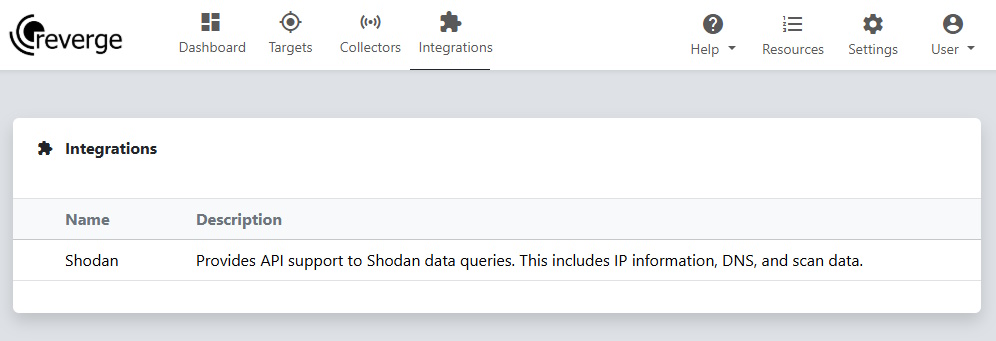
If you have a Shodan API key, you can use reverge’s Shodan integration to quickly gather a list of potentially vulnerable Ivanti EPMM endpoints. We prefer to search Shodan using the favicon hash, which means we first need to grab the icon file from an instance of the affected product. These icons don’t change very often, so it doesn’t have to match the exact version. We can use some of the unique URL paths mentioned in the writeups to search Google for Ivanti EPMM instances.
If we click on the link and click “View Page Source” we can search for a link to the website’s favicon.
Next we click on the favicon.ico link, right click and select “Save Image As”. With a copy of the favicon image we head over to reverge and select the Shodan Integration.
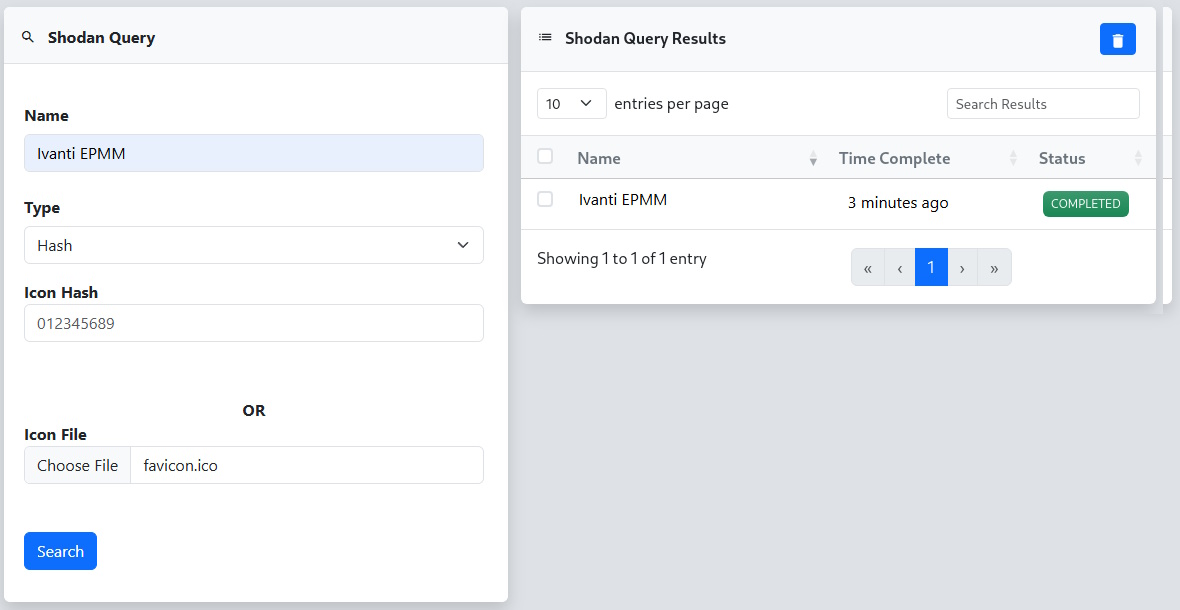
From here we give the Shodan search a name, select the “Hash” Type, choose the favicon image as the Icon File, and click the Search button. An entry will be added to the Shodan Query Results table that we can click on to view the results.
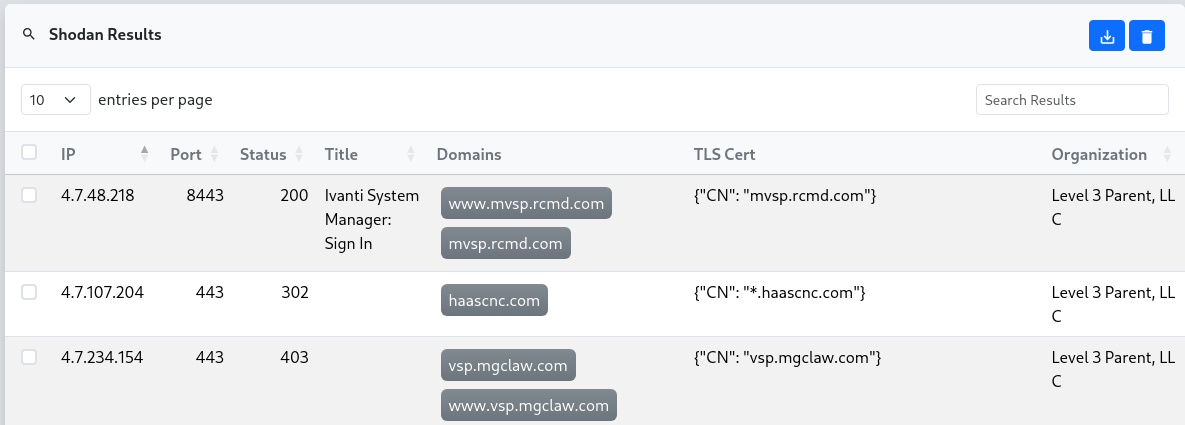
The results table shows all the endpoints Shodan found that match the specified favicon hash. However, the list includes a mix of different Ivanti products, versions, and availability. To start scanning and gathering more details, we need to import this data into a reverge target.
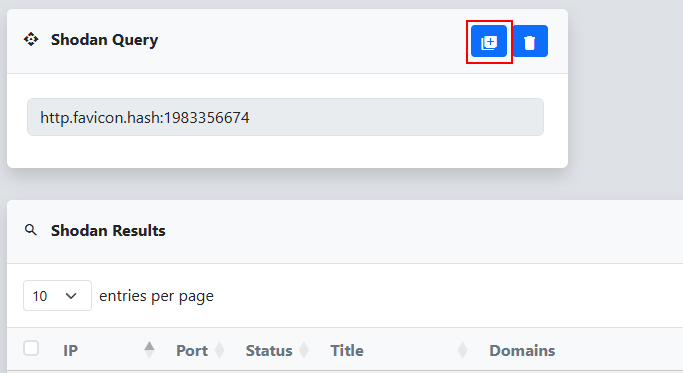
To import all of the results into a reverge target, we click the Create New Target button in the Shodan Query dialog.
Depending on how many results there are, the import might take a minute. Once it’s done, you’ll be taken to the Scope tab of the new target created in reverge. This target will include a consolidated list of subnets, domains, and URLs pulled from the Shodan scan results.
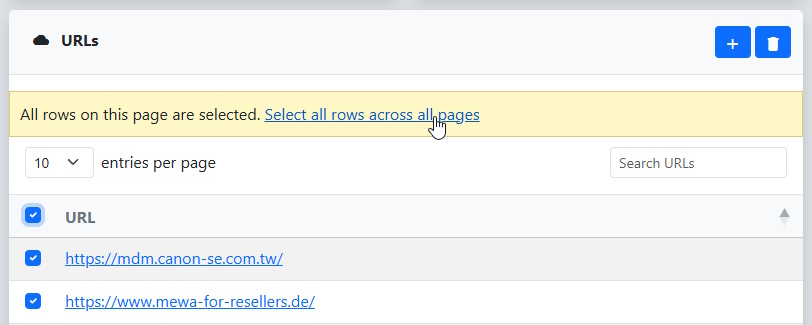
Since we know this is a web application, we can scroll down to the URLs dialog and select all of the table entries to begin an initial scan. We click on the checkbox in the header row to select all of the entries in the page, and then click the Select all rows across all pages link to select all the URLs in the table.
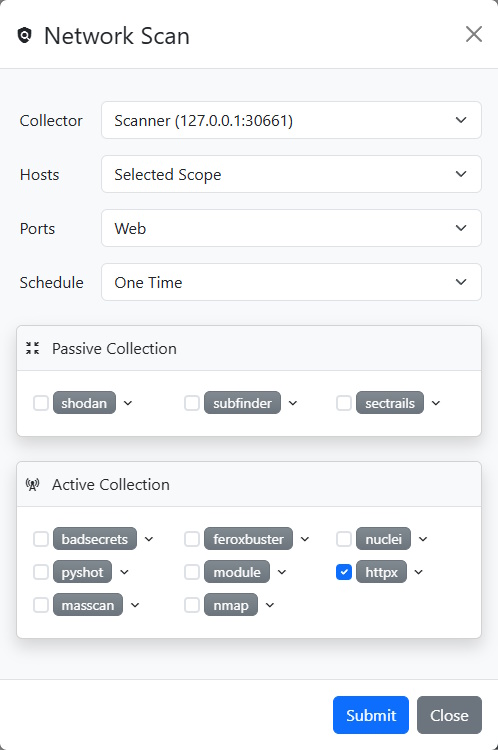
Once the endpoints are selected, we click the  button in the target header to open the Network Scan dialog. From there, we select httpx to collect additional information from the potentially vulnerable endpoints. Finally, we click Submit to start the scan.
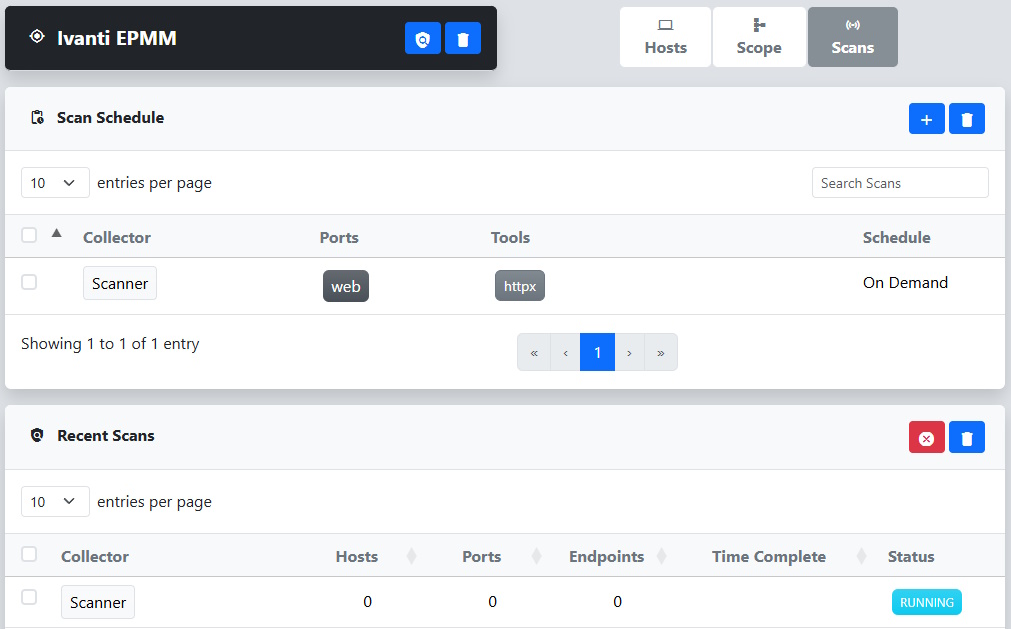
This adds a new entry to the Scan Schedule table under the Scans tab. When the selected Collector checks in next, it will kick off the scan and a new entry will appear in the Recent Scans dialog.
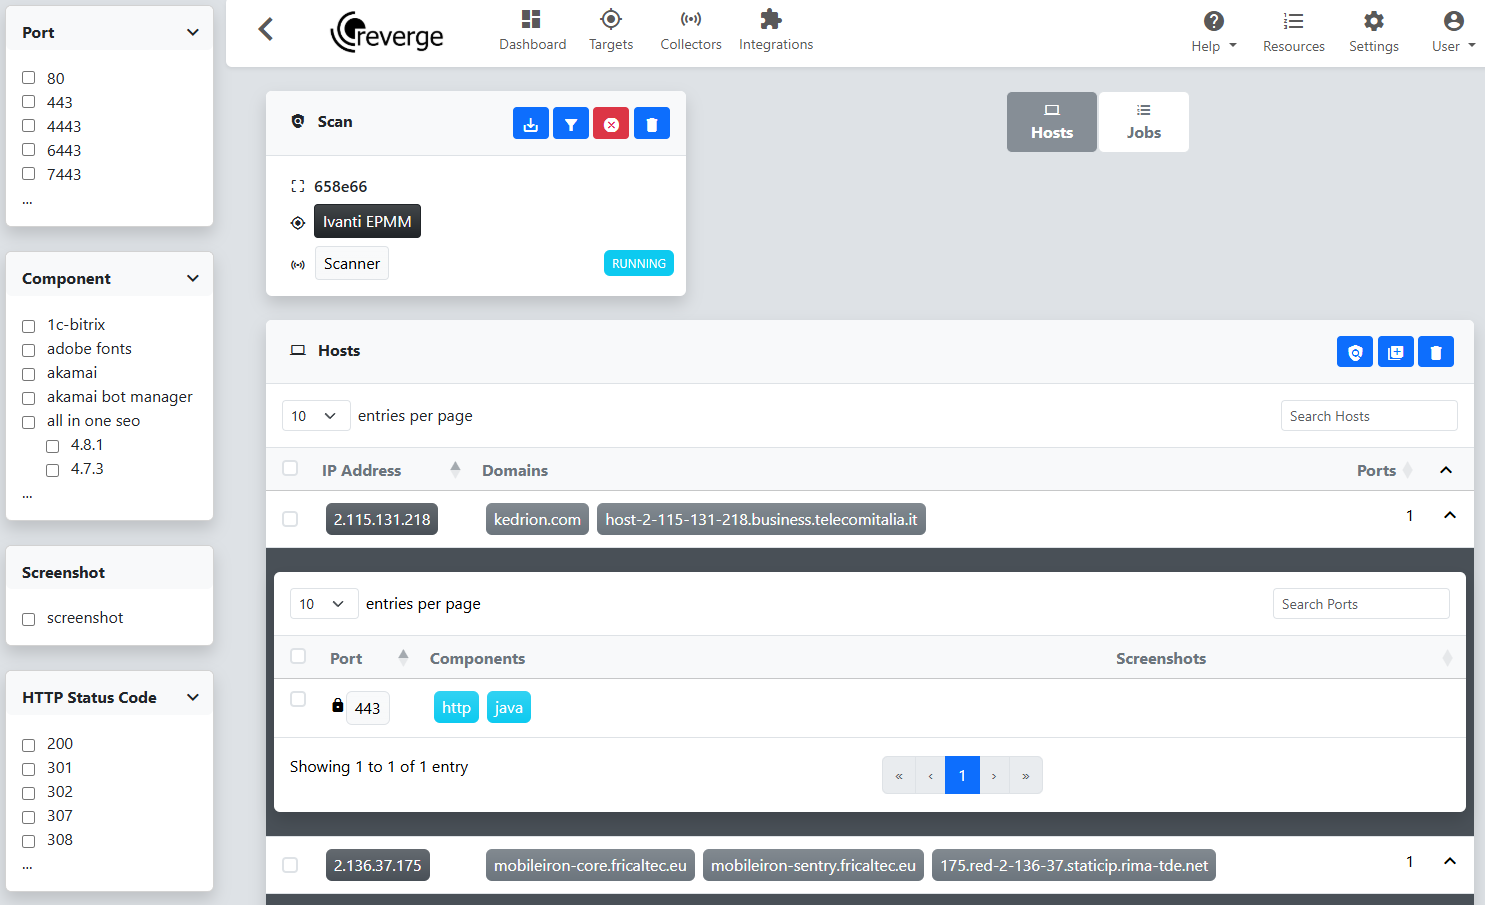
Clicking on an entry in the Recent Scans table takes us to the scan details page, where we can track the running jobs and view the results.
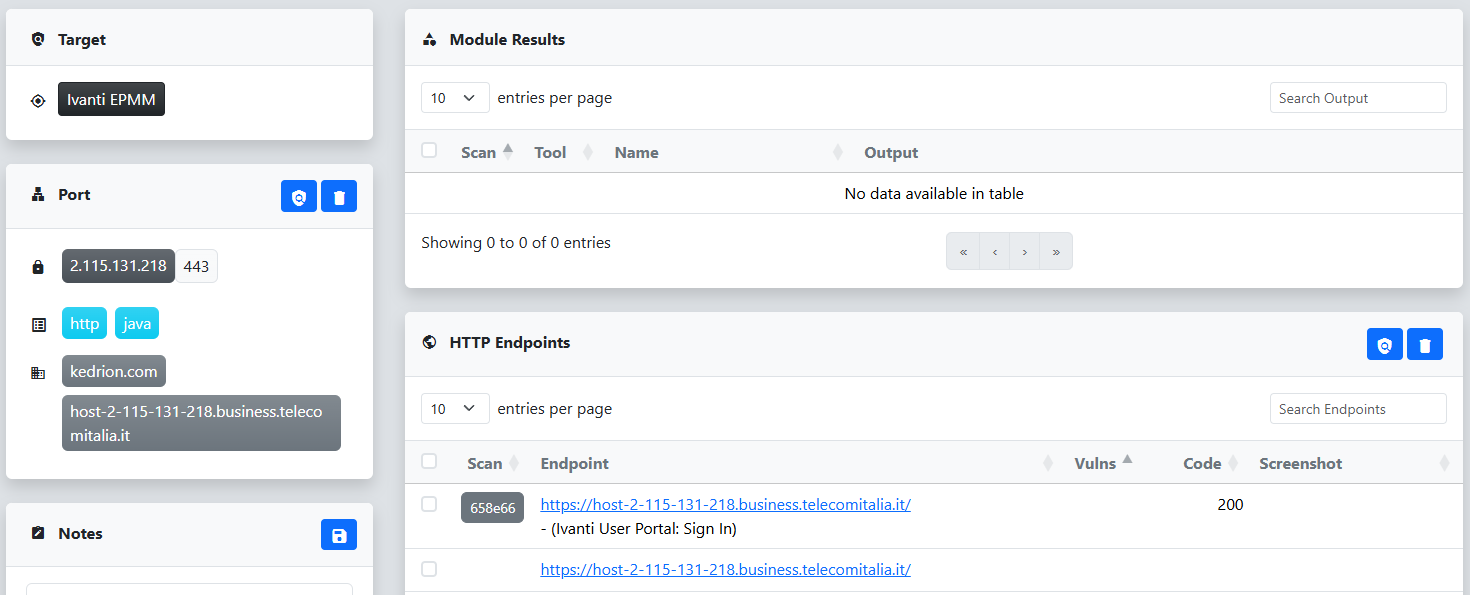
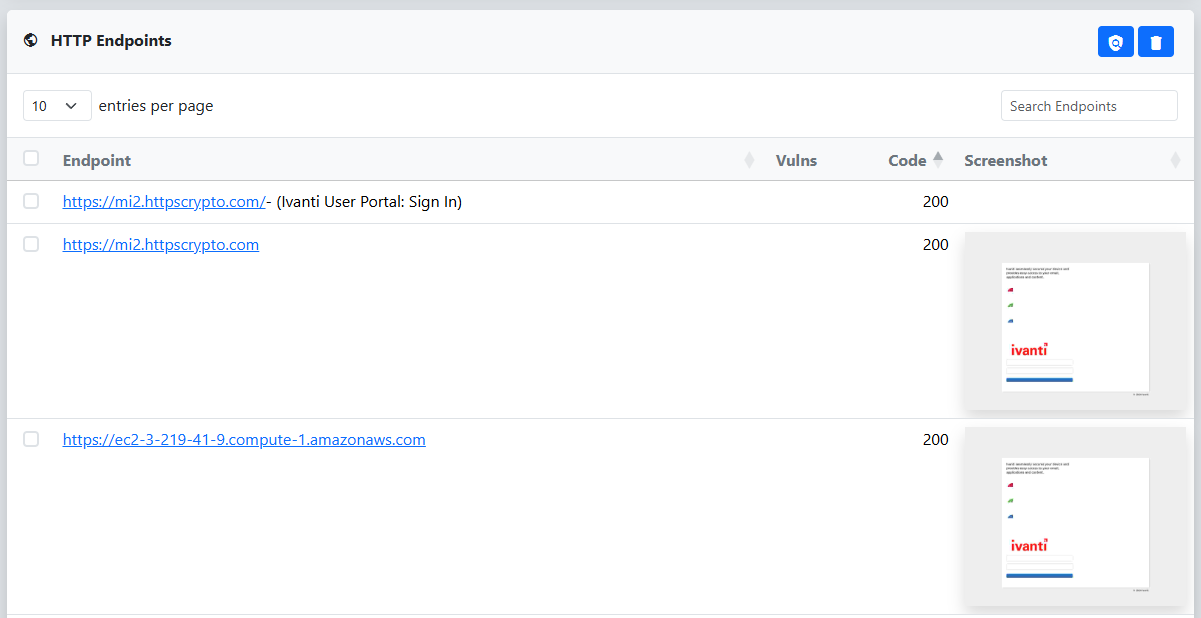
At this stage, it’s still unclear which endpoints are actually running the Ivanti EPMM software. While we could capture screenshots for all of them, we’d rather narrow down the list first. We start by clicking on one of the entries that lists Java as a component, based on our earlier research linking Ivanti to Java. In the HTTP Endpoints table, we notice the web page title references “Ivanti User Portal,” which is a promising lead. To confirm, we click the link to open the page and see that it is in fact Ivanti EPMM.
With that in mind, we open the Component dialog in the filter pane on the left and apply a filter to show only ports where Java is listed as a component. After clicking the Filter button, the scan results refresh accordingly. To help verify that we’re targeting the correct systems, we initiate a pyshot scan to capture screenshots of selected endpoints. We begin by clicking the checkbox in the Hosts table header to select all entries on the current page.
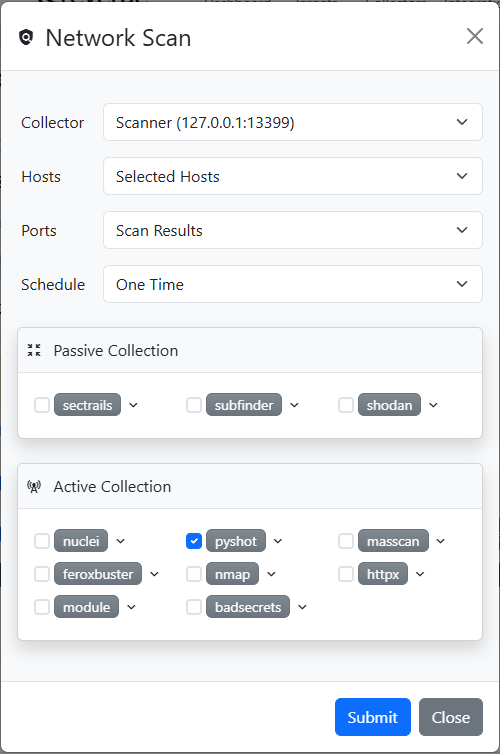
We can then click the  button in the target header to open the Network Scan dialog. This time we select pyshot to capture screenshots for all of the selected Java endpoints and click the Submit to start the scan.
Once the pyshot scan completes, we review the screenshots of the scanned ports to quickly verify whether they are indeed running Ivanti EPMM.
At this stage, we’re confident enough in the filtered set of endpoints to run Nuclei against them to assess exploitability. While an existing Nuclei template is available for this test, we’re hesitant to use it as-is. First, because it executes a command on the target, and second, because it generates outbound traffic by contacting an Interactsh server. To avoid these concerns, we’ve created a modified version of the template that simply checks for template injection using the standard multiplication technique demonstrated in the WatchTowr post.
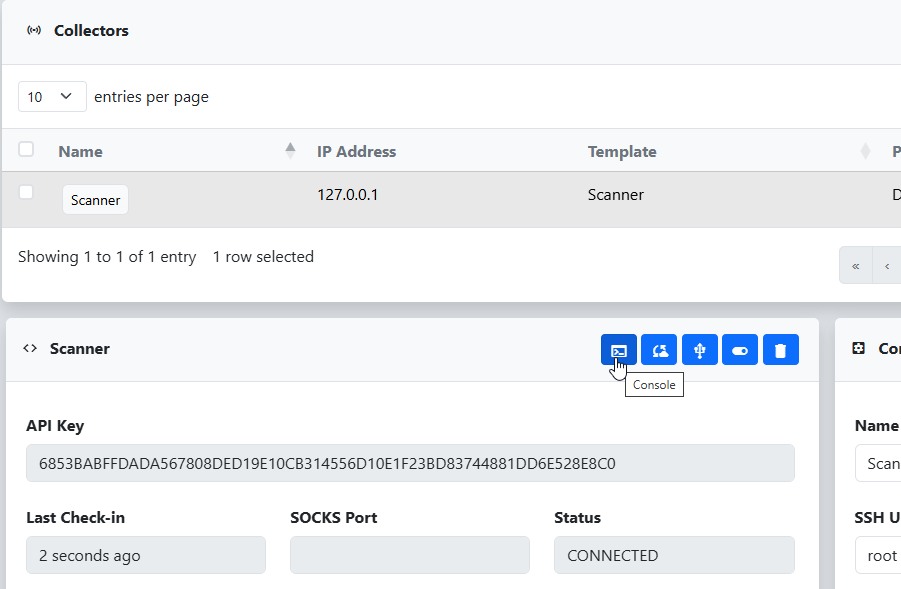
To deploy our updated version to the collector, we open a console via the Collectors tab in the top menu of reverge.
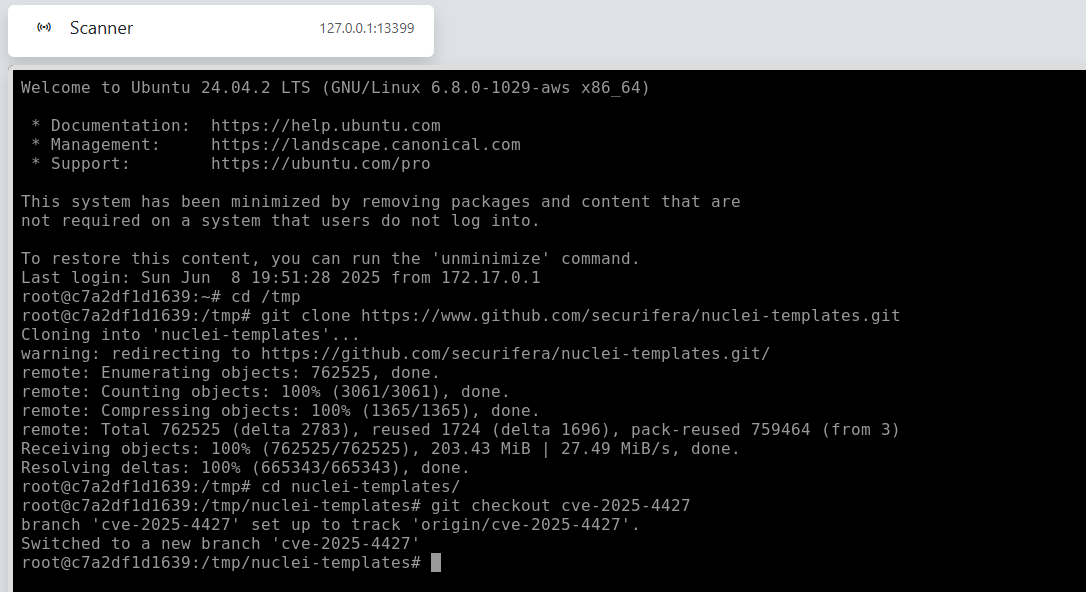
From here, we simply clone our fork of the nuclei-templates repository and switch to our custom branch, making the updated template available to the scanner.
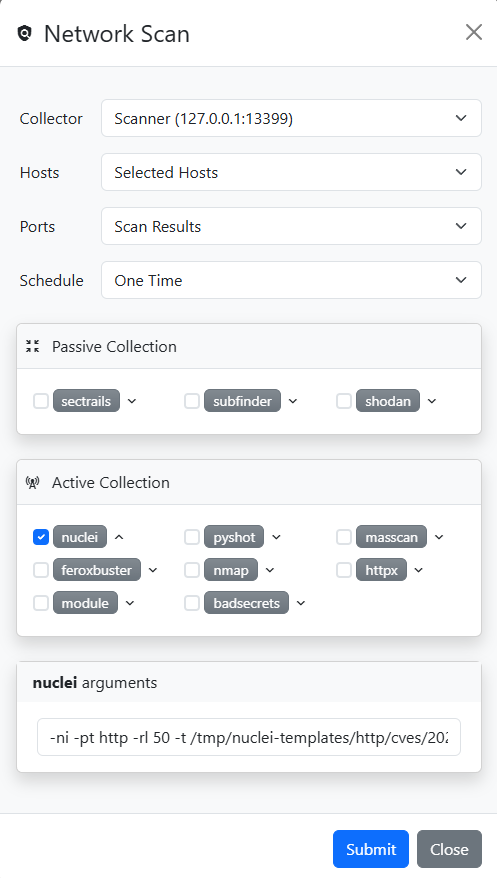
With the updated Nuclei template now available on the collector, we navigate back to our target to launch a Nuclei scan against the Ivanti EPMM endpoints. With the Java component filter still applied, we click the checkbox in the Hosts table header to select all entries on the current page, then click “Select all rows across all pages” to include all filtered hosts. Next, we click the  button to open the Scan dialog. This time, we choose Nuclei and use the dropdown next to it to modify the arguments, specifying our custom template. Finally, we click Submit to start the scan.
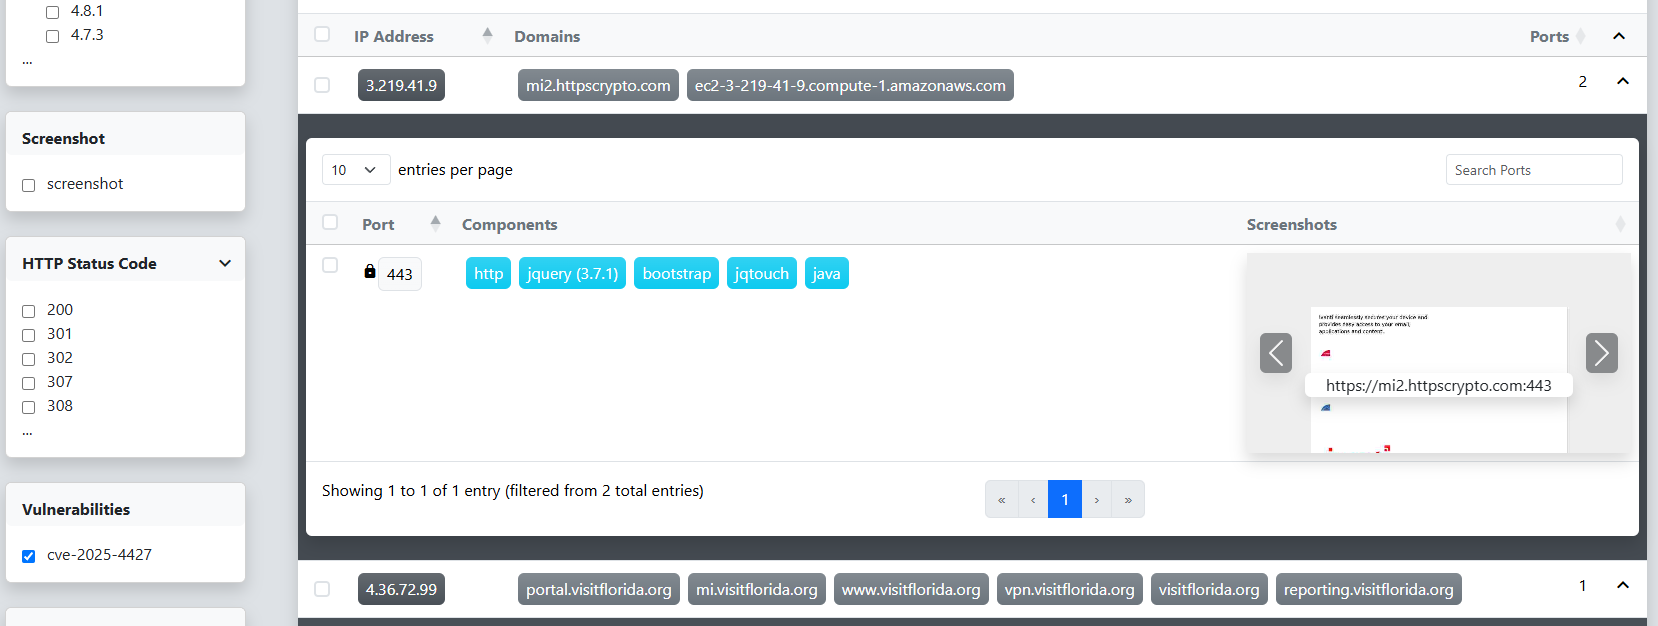
Once the scan completes, we apply the new CVE-specific filter to narrow the results down to only the ones relevant to our findings.
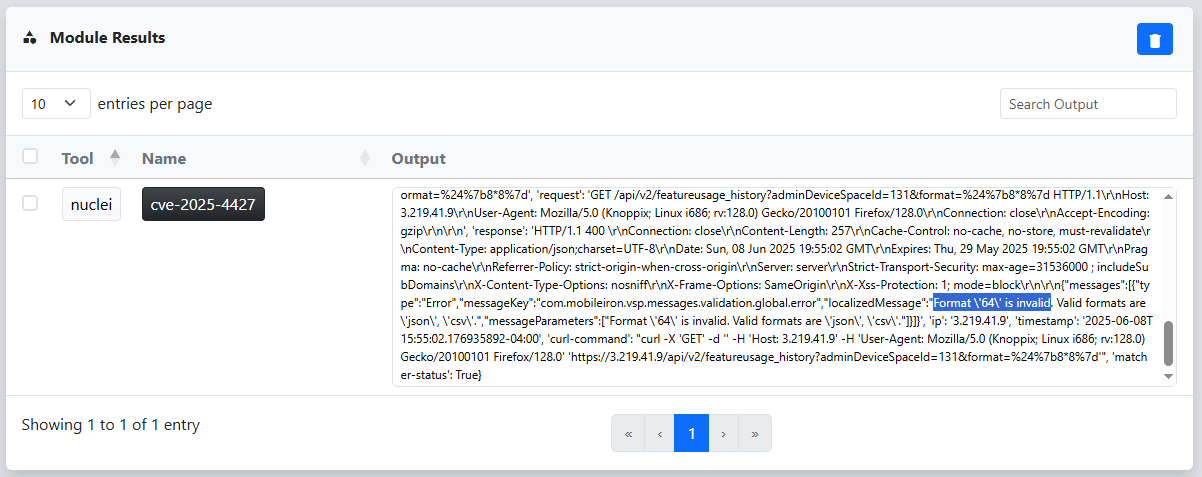
By drilling down into one of the results, we can review the Nuclei scan output to verify the vulnerability is exploitable. The response clearly reflects the result of our template injection payload, 8*8, confirming exploitability.
This is just one example of how reverge equips security professionals to rapidly identify, assess, and act on critical vulnerabilities within target environments. Its intuitive interface makes it easy to search, sort, and isolate high-risk systems, while integrated tooling allows for seamless verification and exploit testing. When time is limited and precision matters, reverge proves invaluable for prioritizing and executing effective assessments at scale.



 button in the target header to open the Network Scan dialog. From there, we select httpx to collect additional information from the potentially vulnerable endpoints. Finally, we click Submit to start the scan.

 button in the target header to open the Network Scan dialog. This time we select pyshot to capture screenshots for all of the selected Java endpoints and click the Submit to start the scan.

 button to open the Scan dialog. This time, we choose Nuclei and use the dropdown next to it to modify the arguments, specifying our custom template. Finally, we click Submit to start the scan.